I'm back with a 1994 Islander 221V!

Gibbles

Commander
Joined
Nov 14, 2009
Messages
2,037
New prop ordered the other day.
I confirmed the other day that the props this thing has currently are both high five.
23 pitch and a 17 pitch.

I ordered a 3 bladed 4 1/2 inch with a 19 pitch off of amazon to try out.
From the reviews, it's a nice combo with the 4.3 MerCruiser and towing tubes around.

I also have a prop wrench in the boat now, figuring I can load up all three props when at the lake with the fam to try different options.

I'm thinking this weekend I'll run the 23 pitched high 5 to see if I still hate it.
Then swap the 3 bladed prop on to see how it does.
 
Last edited:

Gibbles

Commander
Joined
Nov 14, 2009
Messages
2,037
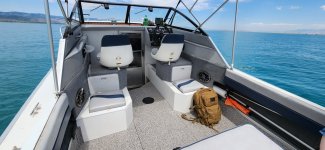
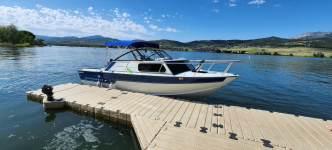
Splashed over the weekend.
The outing went very well, I think the water in the oil has stopped and it's just working the remaining bit out.
splash1.jpg


splash2.jpg
Ran it several hours on the lake near me, did some trolling with the little yamaha 9.9 kicker while I let the engine cool off (heat cycles)..

I found I'm digging the remote troll and its wireless remote. :cool:
I sat on the front with it chooching me around and had no problem steering the boat around the lake.

Then later around noon the lake started filling up.
Tons of boats and skidoos, wake boarders were 100% worse than the skidoos?! :ROFLMAO:

As the day progressed, it got hotter and hotter outside.
The top went up and we proceeded to just cruise around the lake.
I found working the edges of the lake and going through others wakes seemed to be the best throttle usage for the ring seating adventure.

Oil changed, and so far, it looks pretty decent, I'm not seeing much water if any left in there.
I did see a little steam from the crankcase vents, but I think it's just working its way out at this point.
 

Gibbles

Commander
Joined
Nov 14, 2009
Messages
2,037
Also it has been over 100F the last few days.
I let the boat sit outside with the cover off for a solid day before the adventure.

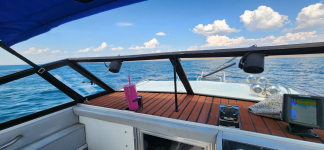
The Faux teak finally started doing some shrinking?!
more than I thought it would for sure.
One side almost looks like it's sun burnt a little. :unsure:
burnandshrink.jpg


Oh well, it looks great but I'm also having issues with it sticking to the aluminum.
If I end up redoing it, I'm planning to clean the aluminum and hit it with some etching primer before applying.
That seems to be helping quite a bit.
 

Gibbles

Commander
Joined
Nov 14, 2009
Messages
2,037
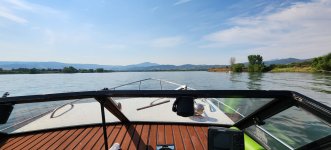
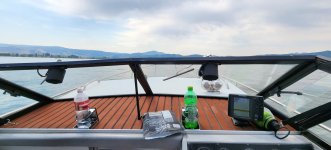
I had a nice long weekend with the Islander (Thursday - Sunday)
IslanderSplashed1.jpg

The Faux teak is showing a little sunburn and it shrunk from sitting in the 100+ degree heat, but it still looks pretty decent overall.
Screenshot 2024-07-23 113944.png

The water at this lake is super clear and blue.
Screenshot 2024-07-23 114015.png
 

Gibbles

Commander
Joined
Nov 14, 2009
Messages
2,037
I also did some anchoring and got to try out the swim platform a few times.
That's the first time I have ever done that on a boat. :cool:

I'm really glad I went with the swim ladder that had extra steps vs a basic 2 or 3 step ladders.
It made it much easier to deal with.

I really like it, especially when it's just so damn hot outside, jump in the water and do a few laps around the boat to cool off.
 

Gibbles

Commander
Joined
Nov 14, 2009
Messages
2,037
I have been doing my best to enjoy the boat as much as possible, I missed a weekend because the wife felt she was too sunburnt from the weekend before that.

Last weekend we went out with another group, their little Glasser had the fun stuff like a tube and a wake board.


I have been thinking about getting a tube, so i finally pulled the trigger.

I bought a 12v high flow pump, airhead brand, and I'm planning to hardwire a dongle with a quick disconnect with a cap for its use/storage.
Maybe one day I'll install a flush plug, for now a dongle should work.

And I opted to get a two-person "wow" branded towable, spent a little extra for one that looked like it was easier to get on and stay on.
$149 shipped next day via amazon.
https://www.amazon.com/dp/B077K4BK3Z?ref=ppx_yo2ov_dt_b_product_details&th=1

And reading they suggest a tow rope with a ball in the middle for a better experience for the captain and the riders.
I opted for the airhead, it came the same day so I went with it.

https://www.amazon.com/dp/B01713ON4M?ref=ppx_yo2ov_dt_b_product_details&th=1

I think the WOW branded one looked a little better since it has a covering to protect it, but it was iffy if it would arrive by this weekend, so i went with this.

I tested the pump by connecting it to a car battery, I found it filled up quicky, and the deflate function was just as fast.
It should work well to keep the toys deflated when not in use, and then fill up when needed.

I have an image but I'm getting errors trying to upload it? :cry:
 

Gibbles

Commander
Joined
Nov 14, 2009
Messages
2,037
I tried a few times, I can't upload an image of the toys.

Anyways, moving onto the next subject.

Last weekend I finally did some beaching with the islander.
Pulling into the boat camping cove at the local lake, I followed suit with the big cabin cruisers, dropped anchor in the front and backed up to the beach.

It went really well overall, but we didn't drop the anchor quite far enough out, I ended up with the lower in the full trailer position resting on the shore line a bit.
I just started imagining damage happening to that expensive gimble housing. :ROFLMAO: :cautious:


We also had a boat full of people aboard, and the father in law on the front to drop anchor.
I decided it would be really hard for me to park if it was just myself and the wife, so I'm now looking at anchor rollers for the front, and a possible windlass to assist me.

I'm just not sure what to buy, and what sizes I need.
At a minimum, a bow roller is needed to make it a little easier/faster to drop anchor.
 

Gibbles

Commander
Joined
Nov 14, 2009
Messages
2,037
WOW also sent me a little booklet with images and numbers of their other products.
One that caught my eye was a floating dock/platform.

I saw one of the big cruisers had those foam floating pads, they used that to cross from the water to the beach.
it seemed like a great idea.

The WOW floating platforms will zip together, allowing you to expand them.
I might try a couple of them to see what I think, but maybe not until next year.
 

jbcurt00

Moderator
Staff member
Joined
Oct 25, 2011
Messages
25,172
Pix are fubar at the server level. IT/Admin are aware, no fix yet

SOTY 2024 😎
 

Gibbles

Commander
Joined
Nov 14, 2009
Messages
2,037
I finally got the islander out for the first time this year.
I had 6 adults amd 4 kids onboard.
And i finally got to try out the tube i bought.

Everything went great, except for the trim sensors.
That took a big crap on me while out, i had to guess where the trim was afterwards.
The water had some algae, so even looking at the lower while i was in the water I had no idea where it was.

So i ordered a new set of quicksilver sensors, the ones on the boat are Sierra branded ones.

I took the cover off of the gauge side and found a little grease and some water in there.
It might work now, but I'm just going for the replacement at this point.

At the end of the outing i guessed wrong and chewed up the 17 pitch high five prop at the boat ramp.
I wasn't a fan of those anyways, but i still hate to loose a spare prop.

17 pitch seemed perfect with a full load of peps, just have to watch the rpm when on a plane.

Then the next thing.
Trim tabs.

With a full load of people at the rear, it would not get on a plane.
Two adults sitting topside at the front, it made a noticeable difference.

I also noticed some listing while underway with an uneven load, making me lean more towards the power adjustable trim tabs.

Right now I'm thinking bennett electric tabs.
Then i have my choice of controller.

It's not too much more to get the fancy auto or manual adjust system.
It also sounds like it has the ability to tie into my fishfinders gps to get a speed reading.

Controller model number: AP000A1HA
For those that want to search on it.

Then I'm trying to decide 24x12 or 12x12 trim tabs.
Doing research and knowing my boat would probably benefit from the extra lift i was thinking about the 24in wide tabs.
But then i have the problem about space.

Using a measuring tape to gauge width, It looks like I'll probably end up moving or removing the hull anode to make it work, probably with either 12 or 24in tab.

I'm hoping to make a decision soon so i can get these things ordered.
 

airshot

Vice Admiral
Joined
Jul 22, 2008
Messages
5,616
My 22' Islander shows a max load of 7 adults @ 150# each....perhaps a little overloaded ? Getting that much weight properly distributed is difficult at best. If your going to be hauling that much weight, trim tabs are your only option.
 

Gibbles

Commander
Joined
Nov 14, 2009
Messages
2,037
Yeah, i was a little surprised to see that many people showed up.
The wife noted the capacity tag before we made it to the other dock to pick everyone up. :ROFLMAO:

I'll have to look at it again, i thought she said 9 but it was probably 7.


And this morning i decided to pull the outdrive off before work.
I haven't done it this year yet, plus I wanted to look at the bolt location for the trim sensor retainer/seal.

I finally figured out where this metal ring goes.
It has been loose and flopping around since i bought it.
Looks like it's a bellows retainer... lol

So i might have found a source of a small leak.

I'm thinking I'll do the bellows while I'm at it.
I have no clue what bellows the prior owner used, but he did mention he did it not long ago.

I'll pick up a quicksilver set and some tools.
 

airshot

Vice Admiral
Joined
Jul 22, 2008
Messages
5,616
Even if yours is rated for 9.......remember they figure 150# per person, so how many are over that 150# ?? A few 200# folks and you need to subtract one....etc ! Weight distribution is always a problem when the boat is at full capacity.
 

Gibbles

Commander
Joined
Nov 14, 2009
Messages
2,037
well, I ended up also picking up the shift cable and the special long socket for it.
I'm willing to bet the shift cable is original.
Especially since the lock wire on the lower end looks like they used a safety wire tool (professional looking).

This morning, I did a little more work on the boat, pulled the pivot pins on the side.
I already had the bit from the engine alignment tool I bought last year.
it took my big air impact to get it out on reverse max!

I also pulled the shift cable core out, not too bad but it was full of water. 🙃
Replacing it is the correct decision. (y)


I finally remembered to snap a picture with the boat in the water, usually I'm so busy I forget.
1751496013300.png
 

Gibbles

Commander
Joined
Nov 14, 2009
Messages
2,037
Trim tabs have been ordered.
I went with Bennett electric bolt with the auto controller.
Size = 12x12.

If I went with the wider ones I was looking at moving my fish finder and Hull Anode on the starboard side. I was willing to entertain the idea of moving both, but the port side had the biggest issue; the inlet and outlet ports for the LiveWell.
That I'm not moving, those are big holes! :ROFLMAO:
12x12 is a nice safe size.

I can't wait to see if I can even mount the tabs into the transom wood, I'm figuring there might be a slight issue.
I don't recall how far down the transom goes, and there's no way I'm getting supports in there w/o removing the floor.

In theory most of the force should be transferred to the shock, especially with the standard tabs...
:unsure:

I also messed up and ordered the standard trim tabs, I meant to order the Edge mount ones for less transom space needed.
Edge mount requires less height, and I'm concerned about the swim platform.

The standard requires more height on the transom due to the way they mount the shocks to the tabs, I assume the standard is stronger.
The edge mount ones have the shock mounting clear at the edge making the shock mount at a steeper angle.
Oh well, the seller allows returns so it will let me do some test fitting.
I'm willing to dig into the platform/remove wood material if needed, but I would rather not.

Ebay had a coupon code for 10% off with a max of $75.
Luckily the tabs are ordered separate, tabs and then the controller.
So, I split that order up for a solid $100 off. (y)
 

Gibbles

Commander
Joined
Nov 14, 2009
Messages
2,037
Well, I got the trim tabs (mostly) installed over the weekend.
I turned on the OCD switch while I worked, super time consuming doing measuring, marking, adjusting, measuring, etc.

One of the tabs on the starboard side, it also shares the swim ladder location.
the tabs are stamped stainless steel, pretty rounded no real sharp edges.

But I opted to go ahead to blend the edges in to avoid a chance of someone having a bad day on my boat.
I ended up doing some polishing on that tab to hide the scratch lines I made during blending with the 3M pads I used.

I also rounded off the hinge joints and did some polishing.

On the portside I didn't go as crazy since it's protected by that Yamaha outboard and no ladder.
I still rounded the edges off, but I didn't go crazy/OCD with it.
I know I'll notice the lack of a polish at the boat ramp, but whatever! :ROFLMAO:

The real difference wasn't noticed until I installed the tabs fully.
the hinge for these tabs works off of two plates that have a stamped C in them.
then a backing plate that locks it all together.
The one I spent an hour on is smooth when moving up and down by hand, real smooth.
The other one has some friction.
Sounds/feels like it catches a little on the corners in some positions.

It should work itself in just fine, especially when the hinge is lubricated with water.

I thought about taking it apart to smooth up the hinge, but man 5200 is always such a pain to deal with.

Another issue I ran into, where you screw the tabs into the boat.
No wood backing.
Mounting location is too low.

Bennett says it's best to use a backing plate, but I can't get back there with the floor in place.
Bennett, said it will work fine since most of the force is applied to the ram and not the hinge.
So, I opted to use 5200 on both hinge plates to really help keep it stuck to the back of the boat.

another difficulty was setting the retracted spacing.
When installing them the instructions say to use a straight edge along the bottom of the boat.
then use that to set the angle.
lots or rivets to really mess you up.

I used jackstands, bits of 2x4's and some cardboard slices to pin an aluminum angle I had in the garage to the bottom of the boat.
then used that to set the ram mounting spot.
what a Pita. :geek:

I remember doing my starchiefs tabs was much easier, but that was years ago. 💩

another big pita, the instructions arn't included in the package, either of them.
The instructions include a page for drilling templates.
somewhat important...

They did include a nice, laminated card that has a QR code for the instructions, but man it would have been really nice if they included a Sheet with the drilling templates 🤠
Exp for those of us that don't own a printer that functions.
Ink dries up if you don't use it often. :cautious:

I ended up going the library to print out the pages with the templates, the helm control template came out perfect, but something happened with the sizing on the ram templates, so I had to get another set.


Anyways, pictures of that install soon.
I'm still trying to figure out where I want the control/sensor box.
It seems this model will self-adjust, so I can install it in any orientation, and it will figure it out.

I'm looking at the middle of the transom above the drive output right now.

The kit came with an extension cable for the helm control (if I want to mount it on the transom, or two extensions for the electric rams (if I want to mount the control box up front).

Another complaint about the rams, they give you the rams with a plug that you put together once installed.

Nice and small, so I think nice I can use a tiny hole through the transom!?

Answer = Nope.
They have a molded part that sticks out beyond the sealing/flat surface and needs to go into the hole a few mm.
So, I got to drill a nice large hole for the wiring. :cautious:
they also put this hard sealant on the wiring that goes into the ram.
that sealant bleed over to the edge of that molded part that sticks out beyond the sealing surface.
I scraped that off the best I could in order to get a nice flat seal against the already gigantic hole.

It would have been nice to get pictures but messing with 5200 = everything gets 5200.
I even managed to get some on my butt?! 🤣
two t-shirts ruined.
So, my Phone stayed in my pocket. 🙃
 

Gibbles

Commander
Joined
Nov 14, 2009
Messages
2,037
I also got the trim sensors, shift cable, and new bellows installed.
that went pretty well.

but the exhaust bellows wouldn't stop sliding off the bottom.
I thought I finally had it, but while working on the tabs I had the drive in the full up/trailer position.
the bellows completely slipped off of the drive side.

I read they have another type of exhaust bellows that doens't need to be clamped to the drive side, it's just a tube.

that would resolve the issue, however reading up it sounds like my mistake was using bellows adhesive on the joint.

So, the drive needs to be removed one more time, I'll clean up both surfaces the best I can and give it another go before I switch to the other type.

😵
 

Gibbles

Commander
Joined
Nov 14, 2009
Messages
2,037
Another issue i had was with the driveshaft bellows retaining ring.
for the life of me I could not get it to seat.
It just kept pushing the bellows back and off of the sealing surface.

the PO said he replaced the bellows, and I noticed the retaining ring was just flopping around in there.
I never knew what it was until I was looking at doing the bellows and noticing some water getting in there.

I finally gave up and cut the ring at an angle and removed all sharp edges before driving it in.

that worked like a charm, the material removed ended up being perfect, and the angle of the cut allowed me to drive the ring in nice and flat.

I'll see how it's looking when I pull the drive off again, but it was driven in there nice and tight, and the bellows seemed to be nicely locked in there.
 

Gibbles

Commander
Joined
Nov 14, 2009
Messages
2,037
Last night I jumped in the boat to play around with the fish finder's tranducer.
I need to relocate it from the far starboard side of the boat to the space between the outdrive and the starboard trim tab.

the cabling was really tight, so I had to go through the entire tangled web on that starboard side to find what was hanging it up.
I found zip ties and some tape.
Once I had it released, I was able to pull more cord through.

thinking about it, I'm just hoping I didn't damage some wire while trying to dislodge it from the sealant.

the fish finder is a Hummingbird 787C2i
Looks like state of the art back when it was made, over 15 years ago.
Nice color screen, chart plotting, gps, maps, etc.

I was also hoping it had the correct connector on the back of it for the new trim tab system.
Apparently, the trim tabs can use the GPS data to control what it does at different speeds.
Probably overkill for this boat.
Sadly, I don't see the same connector, maybe there is an adapter for it but I can't find any info saying Yes it supports the data link.
Newer fish finders do have the connector, so it's an option when I eventually upgrade to something with down imaging.

And when I pulled the fishfinders transducer off of the back of the boat, it uncovered lots of holes!!!
The trim tabs sealed those up nicely, however it got me thinking about a mounting plate. 🤔

So, I went ahead and ordered a nice mounting plate for the boat.
Install it and leave it.
Pretty much overpriced cutting board from what I understand.

I saw they had ones that just glue to the transom, but I question how well it would actually stick.

Aging paint plus I'm starting to wonder if the back of the boat was re-painted with some cheapish paint, looks like a good prep but signs like a smack on the rear corner of the boat caused some paint to flake up on the stern.
then the sign where I see some light flaking around the drive ring, almost like they installed it then masked and painted around it. :sneaky:
that re-paint was either cheap paint or it's just freaking old.
it's not holding up as well as the side paint either.

Future me problems, I would love to fully re-paint this thing. :LOL:


So, I opted for the Berts tackle mounting board that uses a couple screws.
Hopefully the last holes ever.
https://www.amazon.com/dp/B00H0FO82Y?th=1

It should give me plenty of surface area for a future upgrade.
 

Gibbles

Commander
Joined
Nov 14, 2009
Messages
2,037
Well while it was getting ready to rain last night i spent some time trying to find a place to mount the Auto Trim Pro (ATP) control/brain box.

My orignal plan was to screw it to the transom behind the engine and in the middle of the boat.

I even installed a little marine fuse box near the starboard battery to run it.
I also have the wiring for my air tube pump there, a good time to clean up the wiring and make it more professional looking.

In the manual it doesn't go into too much detail about ideas on where to install the control unit, other than to keep it away from speakers and motors that could mess with the electronic compass that's built in.

It says 24inches away from any magnetic source.

Doing some internet searching AI suggests mounting it in the console where it can be clear from heat and moisture that could be in the engine bay.

Then i got stuck with "where else could i mount this thing?"

This unit/version doesn't care what orientation it's mounted, so that's a plus.

I looked at pitting it in the console where all of the gauges and other wiring live along side of the fusebox, there is one spot that might fit it, but i would need to remove some things to get it mounted.

Then i have the motors for the gauges and all of the wiring there, seems like it might cause some magnetic interference?

Another place would be to hang it from the ceeling within the area that the fuse box cover would hide it.

It would either need to be upside down or hanging from one end.

Or i could entertain the idea of stuffing it on the backside of one of the gunnels up in the cabin.

Or i could go with the ugly route.
Bolt it to the bulkhead.
Prior owner already did that with the subwoofer amp.
It would end up pretty close to that amp.

Then i need to run a bundle of wire up the side of the boat.

Or i just rock the original idea, and the easy one.
Mount it in the back of the boat and call it a day.

That way i have a single cable to route to the console, the one for the helm control...


I think the next step is to pull the port battery out and take a look how much space i have there.

It's still technically the engine bay but a little further out.


Anyone have thoughts or opinions?
 
Top